How to Install Insulated Siding
- Supra Home Student
- 2025 February 07T07:37
- Home Insulated
How to install insulated siding? This comprehensive guide walks you through the entire process, from selecting the right materials to completing the final finishing touches. We’ll explore various siding types, detailing their pros, cons, and thermal performance. Preparation is key, so we’ll cover essential tools, surface preparation techniques, and precise measuring methods. The step-by-step installation instructions will equip you with the confidence to tackle this project successfully, minimizing common mistakes and ensuring a watertight, energy-efficient finish.
Learn about different insulated siding materials like vinyl, fiber cement, and foam, comparing their costs, durability, and R-values. Master the techniques for installing trim, caulking, and sealing to prevent air leakage and water damage. We’ll also cover essential maintenance and repair procedures to keep your siding looking its best for years to come. This guide provides a thorough understanding of the entire process, empowering you with the knowledge to complete a professional-looking installation.
Types of Insulated Siding
Choosing the right insulated siding involves considering several factors, including budget, aesthetic preferences, and the desired level of energy efficiency. Different materials offer varying levels of performance in these areas. This section details the characteristics of common insulated siding options to aid in informed decision-making.
Insulated Siding Material Comparison
The following table compares the cost, durability, R-value (a measure of thermal resistance), and maintenance requirements of three popular insulated siding materials: vinyl, fiber cement, and foam. Remember that actual costs can vary based on location, installer, and specific product features. R-values also fluctuate depending on the thickness and specific product specifications.
| Material | Cost (Relative) | Durability | R-Value (per inch, approximate) | Maintenance |
|---|---|---|---|---|
| Vinyl | Low | Moderate (susceptible to impact damage) | Variable, typically 0.9-1.2 | Low (occasional cleaning) |
| Fiber Cement | Medium-High | High (resistant to fire, insects, and rot) | Variable, typically 0.4-0.6 | Medium (periodic painting or staining) |
| Foam (Polyurethane, Polyisocyanurate) | Medium | Moderate (susceptible to UV degradation if not properly protected) | High (3-8 or higher depending on thickness and type) | Low (minimal maintenance required) |
Vinyl Insulated Siding: Pros and Cons
Vinyl siding is a popular choice due to its affordability and ease of installation. It’s available in a wide range of colors and styles, mimicking the look of wood or other materials. However, it’s less durable than fiber cement and can be susceptible to damage from impact. It also has a lower R-value compared to foam insulation.
Fiber Cement Insulated Siding: Pros and Cons
Fiber cement siding offers superior durability and fire resistance compared to vinyl. It’s a more premium option, reflecting its higher initial cost. Its strength and resistance to rot and insects make it a long-lasting choice, although it requires periodic painting or staining to maintain its appearance. The R-value is typically lower than foam insulation.
Foam Insulated Siding: Pros and Cons
Foam insulated siding boasts the highest R-value among the three, making it an excellent choice for energy efficiency. This translates to significant savings on heating and cooling costs over the lifetime of the siding. However, it is often more expensive than vinyl and requires careful installation to avoid damage during the process. Its susceptibility to UV degradation necessitates the use of a protective outer layer, often a vinyl or other cladding material.
Visual Representation of Thermal Performance
Imagine a graphic showing three identical-sized house sections, each representing a different siding material: vinyl, fiber cement, and foam. Each section is depicted with a color-coded heat map representing temperature distribution. The foam-sided house shows a significantly cooler interior temperature, represented by a darker, cooler color, compared to the vinyl and fiber cement sections, which show warmer interior temperatures, represented by lighter, warmer colors. The intensity of the colors directly correlates to the R-value of the siding, with the foam section displaying the coolest temperatures due to its higher R-value, illustrating its superior thermal performance. The vinyl section displays the warmest interior temperature, visually representing its lowest R-value. The fiber cement section falls somewhere in between. This visual aids in understanding the significant differences in thermal resistance offered by different insulated siding materials.
Preparation for Installation
Successful insulated siding installation hinges on meticulous preparation. Proper planning and execution of the preparatory steps will significantly impact the final look and longevity of your siding. Failing to adequately prepare the wall surface can lead to issues ranging from uneven siding to premature failure of the entire system. This section details the necessary tools, materials, and processes to ensure a smooth and successful installation.
Before beginning the installation, gather all necessary tools and materials. Having everything readily available will streamline the process and prevent interruptions.
Necessary Tools and Materials
A comprehensive list of tools and materials ensures a smooth installation process. The specific quantities will vary depending on the size of your project.
- Measuring tape
- Level
- Chalk line
- Circular saw or hand saw (with appropriate blades for cutting siding material)
- Drill with various drill bits (including those appropriate for fasteners)
- Hammer
- Safety glasses
- Work gloves
- Putty knife
- Caulk gun
- Insulated siding panels
- Fasteners (appropriate for your siding type and wall material)
- Primer
- Exterior-grade caulk
- Wood filler (if necessary)
- Cleaning supplies (brush, detergent, pressure washer, etc.)
- Scaffolding or ladder (if necessary)
Preparing the Existing Wall Surface
Thorough preparation of the existing wall surface is critical for a long-lasting and aesthetically pleasing result. This involves cleaning, repairing any damage, and priming the surface.
- Cleaning: Begin by thoroughly cleaning the wall surface to remove any loose debris, dirt, mildew, or other contaminants. A pressure washer can be highly effective for this step, but be sure to use caution to avoid damaging the underlying wall material. For stubborn stains, a mixture of detergent and water can be applied, followed by thorough rinsing.
- Repairing: Inspect the wall carefully for any damage, such as cracks, holes, or loose sections. Repair any damage using appropriate materials, such as wood filler for holes or patching compound for cracks. Allow ample drying time before proceeding to the next step. Ensure that repairs are level with the existing wall surface for a smooth, even finish.
- Priming: Once repairs are complete and dry, apply a high-quality exterior-grade primer. This will provide a better surface for the siding to adhere to and will help to prevent moisture penetration. Allow the primer to dry completely according to the manufacturer’s instructions.
Measuring and Cutting Insulated Siding Panels
Accurate measuring and cutting are essential for a professional-looking installation. Improper cuts can lead to gaps, misalignment, and an overall unprofessional appearance.
Begin by carefully measuring the area where the siding will be installed. Mark the cuts using a chalk line to ensure straight and accurate cuts. When cutting insulated siding panels, use a sharp circular saw or hand saw with a fine-tooth blade designed for the specific material. Always wear appropriate safety gear, such as safety glasses and work gloves, during cutting operations. Dry-fit the panels before securing them to ensure proper alignment and fit. Make any necessary adjustments before final installation.
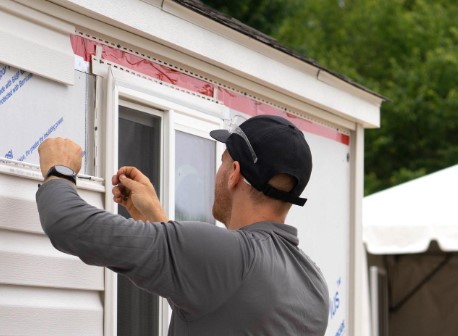
Installation Process
Installing insulated siding is a multi-step process requiring precision and attention to detail. Proper installation ensures a durable, energy-efficient, and aesthetically pleasing exterior for your home. Following these steps will help you achieve a professional-looking finish.
Step-by-Step Installation Guide
The following steps outline the typical installation process for insulated siding. Remember to always consult the manufacturer’s instructions for your specific siding product, as variations may exist.
- Prepare the Sheathing: Ensure the underlying sheathing is clean, dry, and free of any damage. Repair any imperfections before proceeding. This is crucial for a proper and long-lasting installation.
- Install Starting Strips: Begin by installing the J-channel or starting strip along the bottom edge of the wall. This provides a secure base for the first panel and ensures a neat, straight edge. Use appropriate fasteners, spaced according to manufacturer recommendations.
- Install the First Panel: Carefully slide the first panel into the starting strip, ensuring it is level and aligned. Secure it using appropriate fasteners, typically nails or screws, avoiding over-tightening which can damage the panel. Leave a small expansion gap as recommended by the manufacturer.
- Install Subsequent Panels: Continue installing panels, overlapping each panel according to the manufacturer’s instructions. Each panel should interlock securely with the previous one, creating a weather-tight seal. Maintain consistent spacing and alignment throughout the installation process.
- Cut and Fit Panels Around Obstacles: When encountering windows, doors, or other obstacles, carefully measure and cut the panels to fit. Use a sharp utility knife or specialized siding shears for clean cuts. Proper measuring and cutting is essential to prevent gaps and ensure a professional finish.
- Install Corner Trim and J-Channel: Use corner trim and J-channel to neatly finish the corners and edges of the siding. This creates a clean and finished look, and helps protect the edges of the panels from damage.
- Caulk and Seal: Apply a high-quality exterior-grade caulk to seal all joints and gaps, ensuring watertightness. This prevents water infiltration and helps maintain the integrity of the siding system. Pay close attention to areas around windows, doors, and corners.
- Install Finishing Pieces: Install any necessary finishing pieces, such as drip edges, soffit vents, and fascia. These components add to the overall aesthetic appeal and protect the underlying structure from the elements.
Common Installation Mistakes and Their Prevention
Several common mistakes can compromise the integrity and longevity of an insulated siding installation.
- Improper Fastening: Over-tightening fasteners can crack the siding, while under-tightening can lead to loose panels and water infiltration. Always follow the manufacturer’s recommended fastener spacing and depth.
- Neglecting Expansion Gaps: Failing to leave appropriate expansion gaps can cause the siding to buckle or crack due to temperature fluctuations. Always adhere to the manufacturer’s recommended expansion gap specifications.
- Inadequate Sealing: Insufficient caulking or sealant around joints and penetrations can allow water to enter the wall system, leading to moisture damage. Ensure thorough and complete sealing of all joints and gaps.
- Poor Panel Alignment: Inconsistent panel alignment can result in an unprofessional appearance and potential water leakage. Take your time and carefully align each panel before fastening.
- Ignoring Underlying Sheathing Issues: Installing siding over damaged or improperly prepared sheathing can lead to problems down the road. Address all sheathing issues before starting the siding installation.
Fastening and Sealing Techniques for Watertightness
Proper fastening and sealing are critical for a watertight siding installation. Use corrosion-resistant fasteners appropriate for the siding material and climate. Fasteners should be driven straight and flush with the surface of the panel, avoiding damage. Seal all joints and gaps with a high-quality, exterior-grade caulk that is compatible with the siding material. Apply the caulk in a smooth, continuous bead, ensuring complete coverage of all gaps and joints. Allow the caulk to cure completely before exposing it to rain or moisture.
Finishing Touches and Trim
The final stage of insulated siding installation involves meticulous attention to detail, focusing on the aesthetic appeal and long-term durability of your exterior. Proper installation of trim pieces and thorough sealing are crucial for preventing water damage and maintaining energy efficiency. Neglecting these steps can compromise the effectiveness of the entire siding system.
Installing trim pieces around windows, doors, and corners provides a clean, finished look and protects these vulnerable areas from the elements. Caulking and sealing all gaps and joints is essential for preventing air infiltration, which can lead to increased energy costs and drafts, as well as water intrusion, which can cause rot and damage to the underlying structure. The correct installation techniques for both trim and sealant application are described below.
Corner and J-Channel Trim Installation
Precise installation of corner and J-channel trim is critical for a professional-looking finish and to ensure the proper overlap of siding panels. Incorrect installation can lead to gaps, water penetration, and an overall unsatisfactory appearance. The following description details the proper methods for installing these essential trim pieces.
Imagine a diagram showing two intersecting exterior walls, meeting at a 90-degree angle. The corner trim is a pre-fabricated L-shaped piece of metal or vinyl, designed to neatly cover the exterior corner joint. First, the J-channel is installed along the top edge of each intersecting wall. The J-channel is a long, U-shaped piece of metal or vinyl that provides a starting point for the siding panels to interlock and create a neat, weather-tight seal. It should be perfectly aligned with the edges of the wall. Then, the corner trim is carefully fitted over the end of each piece of siding, and into the J-channel. The trim should cover the raw edge of the siding and extend down past the bottom edge of the next panel. Ensure the corner trim is snugly pressed against the wall and the siding, and all joints are tight. Fasteners should be spaced appropriately according to manufacturer’s instructions, avoiding over-tightening. The overlapping of siding panels and trim pieces ensures water runs down the face of the siding and away from the structure.
Caulking and Sealing
After installing all siding panels and trim, carefully inspect all seams, joints, and gaps for any openings. Even small gaps can allow air and water to penetrate, negating the insulation value of the siding and potentially leading to significant damage over time. Use a high-quality, exterior-grade caulk specifically designed for use with the type of siding installed. Apply a continuous bead of caulk to all gaps and joints, ensuring complete coverage and a smooth, even surface. Allow the caulk to fully cure according to the manufacturer’s instructions before exposing the area to rain or moisture. Proper caulking is an essential step in preventing air leaks and water damage, thereby ensuring the longevity and effectiveness of the entire siding system. Failing to adequately caulk will reduce the energy efficiency and increase the risk of expensive repairs.
Maintenance and Repair
Proper maintenance significantly extends the lifespan and aesthetic appeal of your insulated siding. Regular care prevents minor issues from escalating into costly repairs and ensures your home maintains its curb appeal for years to come. Neglecting maintenance can lead to premature deterioration and compromise the insulation’s effectiveness.
Insulated siding, while durable, is susceptible to damage from various sources. Understanding common problems and implementing preventative measures are key to preserving its integrity. Addressing minor issues promptly minimizes the risk of extensive repairs and prevents further damage.
Maintaining Insulated Siding
A proactive maintenance approach is crucial for preserving the longevity and appearance of your insulated siding. The following practices will help you keep your siding looking its best and functioning optimally.
- Regular Cleaning: Wash your siding at least once or twice a year using a mild detergent and a soft-bristled brush or pressure washer (low pressure setting). Remove any dirt, grime, or cobwebs. Focus on areas prone to accumulation, such as gutters and around windows.
- Inspect for Damage: Conduct thorough inspections twice a year, particularly after severe weather events. Look for cracks, dents, loose panels, or signs of insect infestation. Early detection allows for timely repairs, preventing larger issues.
- Caulk and Sealant Checks: Inspect and reseal caulking around windows, doors, and other areas where the siding meets other building components. Deteriorated sealant can compromise the weatherproofing and insulation properties of the siding.
- Gutter Maintenance: Keep gutters and downspouts clean and free of debris. Clogged gutters can cause water to overflow and damage the siding.
- Trim and Landscaping: Keep overhanging branches and bushes trimmed away from the siding to prevent scratching and damage.
Common Problems and Solutions
Several issues can affect insulated siding over time. Understanding these problems and their solutions is essential for effective maintenance and repair.
- Cracks and Dents: Minor cracks and dents can often be repaired with specialized fillers designed for siding. Larger damage may require panel replacement.
- Loose Panels: Loose panels usually indicate a problem with the underlying fasteners. Re-fastening or replacing damaged fasteners is typically necessary. In some cases, the panel may need to be completely replaced.
- Water Damage: Water intrusion can lead to rot and mold. Addressing leaks promptly, often by repairing caulking or replacing damaged panels, is critical. Proper ventilation is also important to prevent moisture buildup.
- Insect Infestation: Inspect for signs of insect activity, such as holes or insect droppings. Professional pest control may be necessary to address infestations.
- Fading or discoloration: Exposure to sunlight can cause fading. Regular cleaning and the application of protective coatings can help mitigate this.
Repairing Minor Damage
Minor damage, such as small cracks or dents, can usually be repaired without professional assistance. The specific repair method will depend on the type and extent of the damage and the type of siding material.
For small cracks, a high-quality exterior-grade caulk matched to the siding color is often sufficient. Clean the area thoroughly, apply the caulk smoothly, and allow it to cure completely before painting or touching up the area.
For minor dents, a specialized siding filler may be necessary. Follow the manufacturer’s instructions carefully for application and curing. Once the filler is dry, sand it smooth and apply paint to match the existing siding.
Larger damage or extensive repairs may require professional assistance. Attempting complex repairs without proper knowledge or tools could lead to further damage.
Ending Remarks
Installing insulated siding is a rewarding project that significantly enhances your home’s curb appeal and energy efficiency. By carefully following the steps outlined in this guide, from material selection and preparation to installation and maintenance, you can achieve a beautiful, long-lasting result. Remember, attention to detail during each stage—from accurate measurements and proper fastening to meticulous sealing—is crucial for success. With patience and the right techniques, you’ll transform your home’s exterior while improving its insulation and value.
Read more:
- Best Insulated Siding For Energy Savings
- Energy Efficient Insulated Siding A Comprehensive Guide
- Fiber Cement Insulated Siding A Comprehensive Guide
- How To Install Insulated Siding
- Insulated Siding Installation Cost
- Vinyl Insulated Siding A Comprehensive Guide
- Wood Insulated Siding A Comprehensive Guide
